

Ceramic coatings have taken the automotive world by storm, providing long-lasting protection and an impressive, glossy finish to your vehicle. But what happens after your car has been ceramic-coated? How do you maintain that showroom shine and ensure the coating performs at its best?
At Fast Car, we know the thrill of keeping your pride and joy looking fresh. So we’re diving into the essential steps for giving your ceramic-coated car a decontamination wash to breathe life back into the protective coating. Whether you’re prepping for the next big show or just keeping it sharp for the daily drive, follow our detailed guide to ensure your ceramic coating stays as good as new.
Why Is a Decontamination Wash Important?
After a few months of road grime, brake dust, and exposure to the elements, your ceramic-coated car may start to lose its hydrophobic beading, and contaminants could become embedded in the surface. A simple rinse won’t cut it. This is where a decontamination wash comes in, restoring the ceramic coating’s performance by removing all the built-up grime without damaging the protective layer.
Let’s walk you through the process, step by step.
What You Will Need
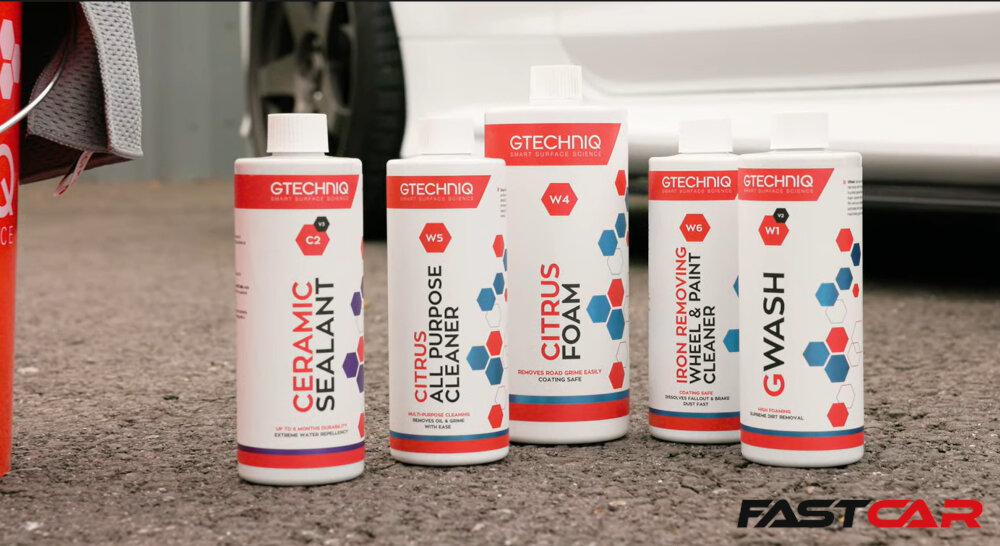
Before diving into the wash, you’ll need some essential cleaning products. We’re fans of Gtechniq here at Fast Car, so naturally we turned to their range of wash and decontamination products. These are designed to be compatible with the Gtechniq ceramic coating we previously applied, so we can rest assured we won’t damage or strip the coating.
- Snow foam for lifting heavy dirt
- All-purpose cleaner (APC) for stubborn grime
- Iron and fallout remover to eliminate iron deposits and contamination
- High-quality car shampoo to thoroughly clean the paintwork
- Microfiber wash mitt and a grit guard bucket for safe washing
- Microfiber towels for drying
- Ceramic sealant for topping up protection (optional but recommended)
Step-by-Step Process for Washing Your Ceramic Coated Car
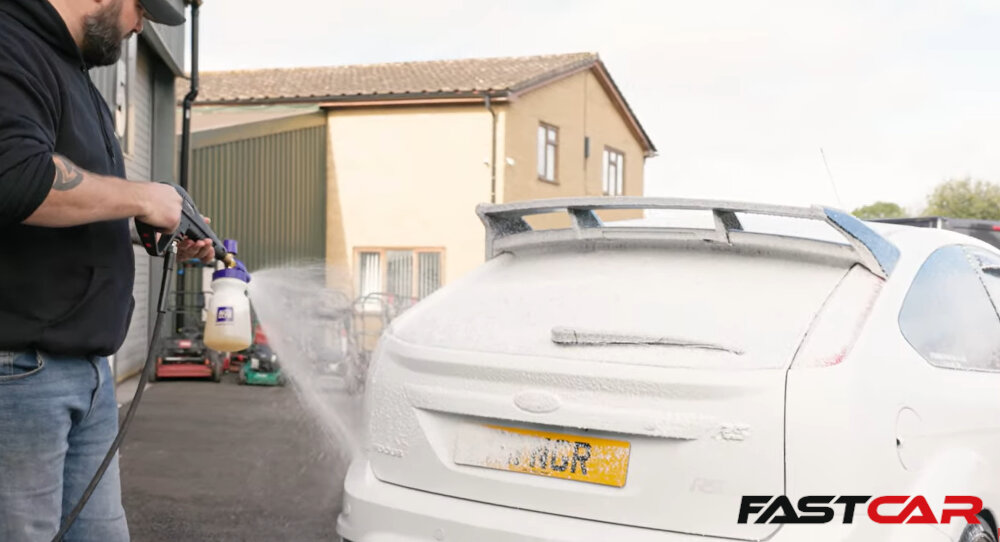
Step 1: Snow Foam Pre-Wash
The first stage of your decontamination wash is to apply a snow foam pre-wash. Snow foam is designed to lift off large particles of dirt, allowing you to safely remove the debris without scratching your car’s surface.
Why Snow Foam Matters
The foam clings to the vehicle, breaking down road grime and dirt, and then slowly drags it down the paintwork. It’s a critical first step that minimizes the risk of scratches during the wash.
- Apply the snow foam generously across the car’s surface using a foam cannon or snow foam sprayer.
- Allow it to dwell for a few minutes. You’ll notice it lifting dirt and revealing your ceramic coating’s water-beading properties.
- Rinse the foam off with a pressure washer, ensuring you remove as much dirt as possible before the next step.
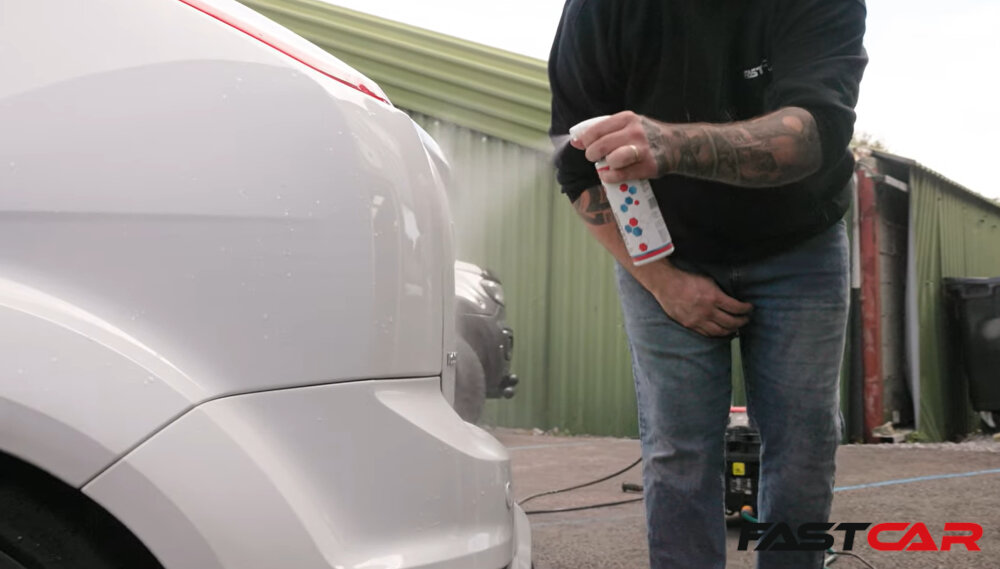
Step 2: All-Purpose Cleaner for Stubborn Areas
While the snow foam removes most of the dirt, there are still stubborn areas, such as the wheels, sills, and wheel arches, that need extra attention.
- Spray all-purpose cleaner (APC) on the areas where dirt tends to accumulate—especially around the wheels, arches, and lower body panels.
- Let it sit for a minute to break down grime, then rinse thoroughly.
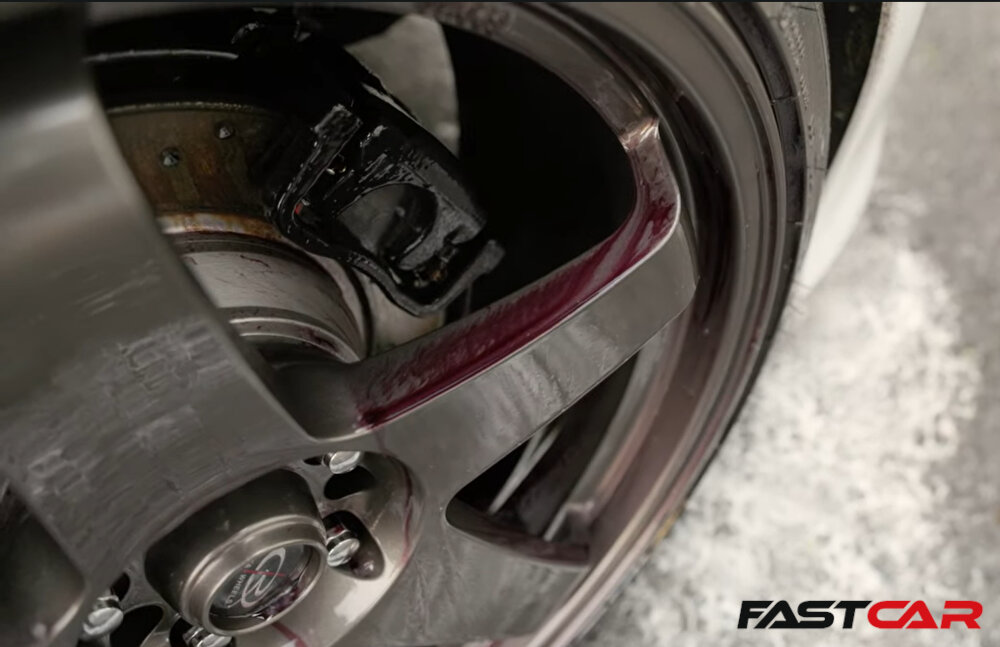
Step 3: Iron & Fallout Remover
Even after the snow foam and APC steps, tiny iron particles from brake dust can still cling to your car’s surface. These contaminants need to be removed before proceeding with a contact wash.
- Spray an iron & fallout remover across your wheels and paintwork.
- Allow it to react with the iron deposits, which will turn purple as they dissolve.
- Rinse off the iron fallout remover using a pressure washer. You might need to use a wheel brush if the build-up is severe, but often, ceramic-coated wheels will require less effort.
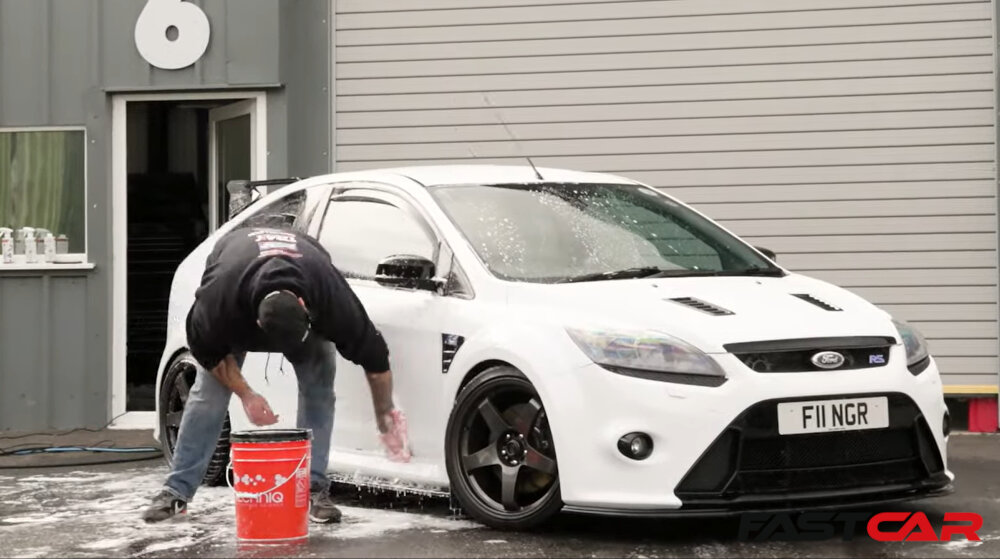
Step 4: Contact Wash with a Microfiber Mitt
Now that most of the dirt and contamination is removed, it’s time for a contact wash. This step requires special attention to avoid scratching the ceramic coating.
- Fill a bucket with car shampoo (preferably Gtechniq G-Wash) and water, placing a grit guard at the bottom to trap any dirt.
- Use a microfiber wash mitt instead of a sponge (which could trap dirt and cause scratches).
- Gently wash the car, starting from the top and working your way down.
- Rinse thoroughly with a pressure washer.
Pro Tip: Why Microfiber Mitts Matter
Microfiber mitts are much safer than traditional sponges because they trap dirt within their fibers, reducing the risk of dragging contaminants across the paint.
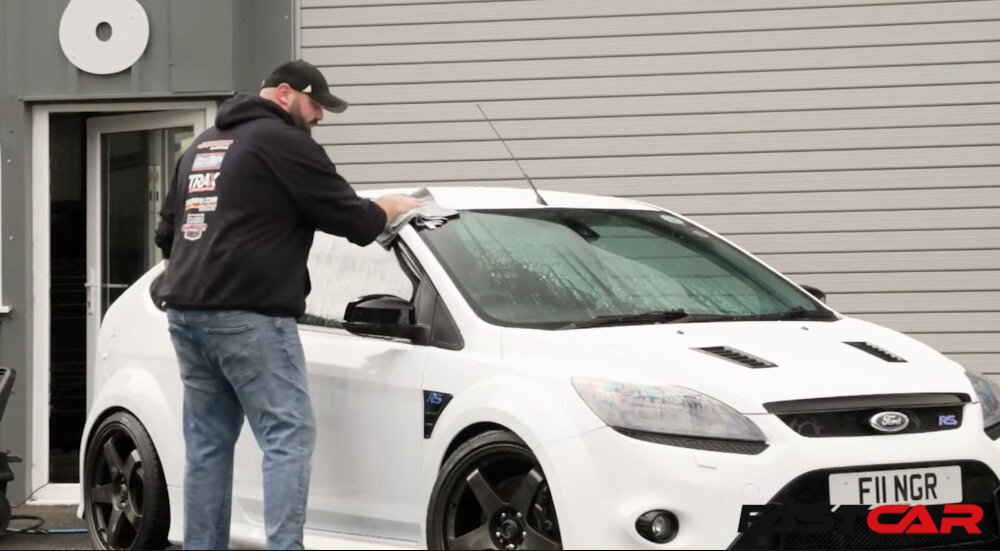
Step 5: Drying Your Car Without Water Spots
Once the car is clean, it’s crucial to dry it properly to avoid unsightly water spots. Plus, we need the car dry in order to apply the ceramic sealant at the next stage.
- Use a high-quality microfiber drying towel to absorb any remaining water.
- Pat dry, working from top to bottom.
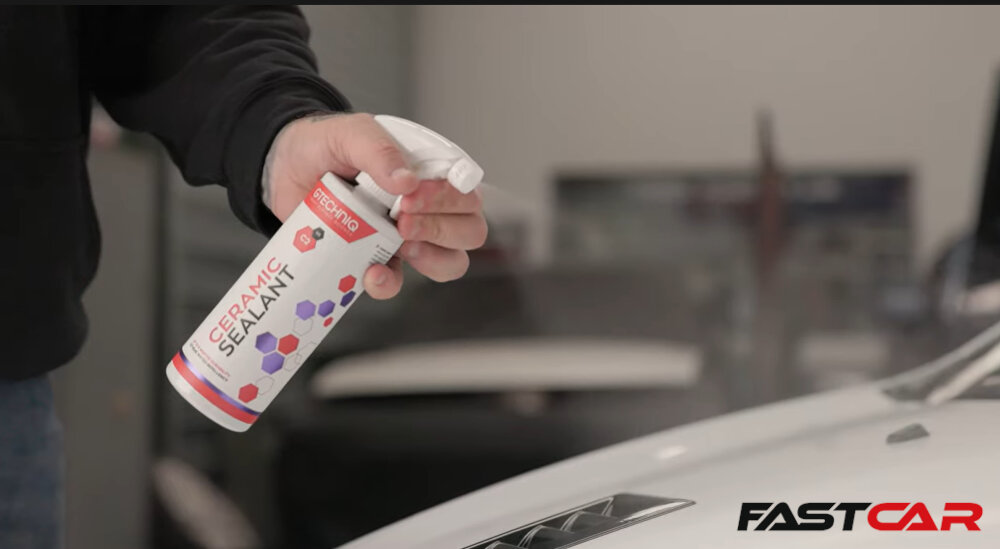
Step 6: Topping Up with Ceramic Sealant (Optional but Recommended)
Now that your car is clean and dry, it’s time to give the ceramic coating a boost with a ceramic sealant. This step adds an extra layer of protection, enhancing the coating’s durability and water-beading capabilities.
- Spray the ceramic sealant onto the surface.
- Wipe off with a clean microfiber towel.
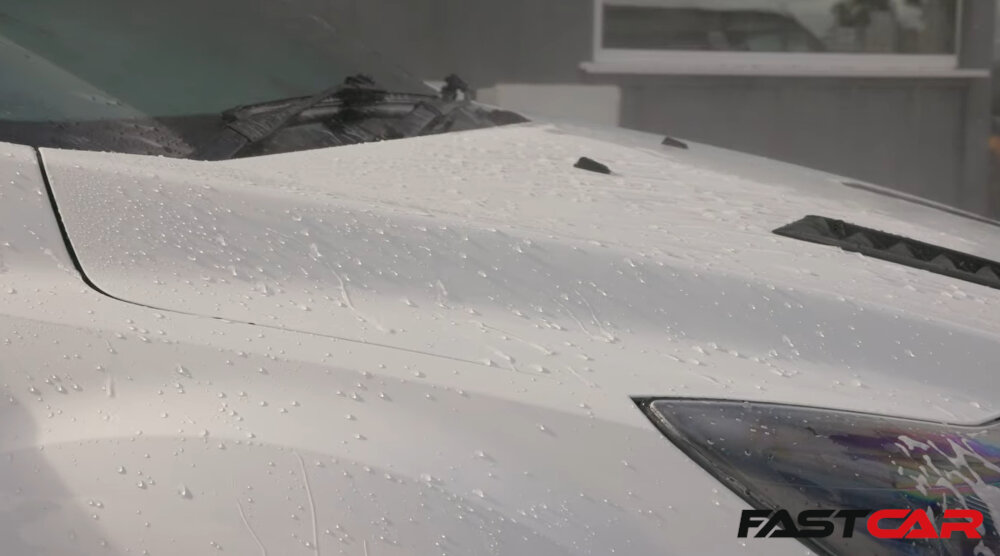
Bringing the Beading Back
Once the decontamination wash is complete, your ceramic coating will come back to life. You’ll notice the water beading beautifully, showcasing the hydrophobic properties of the coating.
That’s it! Your ceramic-coated car is now clean, protected, and ready for the road. By following these steps, you’ve safely removed contaminants without harming the ceramic layer, ensuring your car looks its best for months to come.
Remember, the key to maintaining a ceramic coating is regular decontamination washes like this, paired with the occasional top-up of ceramic sealant. Whether you’re prepping for the next big car show or just giving your car the care it deserves, this method ensures your ceramic coating will continue to protect and shine.
If you want to see the process in action, don’t forget to check out our full video tutorial at the top of this page!
Happy washing, and keep that shine going strong!